Audio Setup Live Event Videography Guide for Pros
- Charlie Puritano
- 13 hours ago
- 9 min read
Bad audio kills good video. That is a hard truth every event organizer and videographer learns, usually the painful way. You can shoot stunning 4K footage, nail your lighting, and frame every shot perfectly, but if the audio is muddy, echoey, or distorted, viewers will click away.
We recently directed an event for 1,000 guests at the Washington Hilton. It was an awards ceremony with several roll-in video segments. We knew from previous experience with the venue that the audio needs were unique. The shape of the ceiling was an acoustical nightmare, causing feedback from any floor-mounted speakers. We had to fly audio from the ceiling truss to make it work. Disaster averted!
This audio setup live event videography guide exists to change that outcome. We cover the gear you actually need, how to evaluate your venue before the first cable gets plugged in, a step-by-step recording workflow, and post-event optimization techniques that turn raw captures into polished, professional sound.
Table of Contents
Key takeaways
Point | Details |
Gear selection matters | Choosing the right microphone type for each situation prevents most common live audio problems before they start. |
Venue acoustics are half the battle | Hard, reflective spaces create echo that is nearly impossible to fix in post-production, so assess the room first. |
Target -12 dBFS for input levels | Setting peaks at -12 dBFS gives you headroom and prevents clipping during unpredictable live moments. |
Always record room tone | Capturing 30 to 60 seconds of silence at each scene location gives you a noise reduction reference for editing. |
Soundchecks prevent surprises | A thorough soundcheck before guests arrive is the single most reliable way to catch and fix audio issues early. |
Essential audio equipment for live event videography
Gear is where most people start, and it is the right instinct. Having the wrong tools on-site is not something you can talk your way out of once the event begins. Here is a breakdown of what you actually need, not the exhaustive wish list, but the working kit.
Microphone types and their best use cases
Lavalier microphones clip directly to a speaker’s clothing and capture close, clean dialogue with minimal background noise. They are ideal for keynote speakers, panel discussions, or any situation where a person will be stationary or moving through a fixed area. Wireless lavs give you freedom, but they introduce potential for interference, so always carry wired backups.
Shotgun microphones mount to your camera or a boom pole and capture directional audio from a narrow field. They work well for capturing ambient event moments, audience reactions, or scenarios where a lav is not practical. The limitation is distance; a shotgun on a camera that is 20 feet from the speaker will pick up more room noise than voice.
Handheld dynamic microphones are the workhorses of live event sound. They handle high sound pressure levels without distorting, making them reliable for presentations, live music, and Q&A sessions. If there is a house PA system at your venue, there is a good chance they already have handhelds on stands.
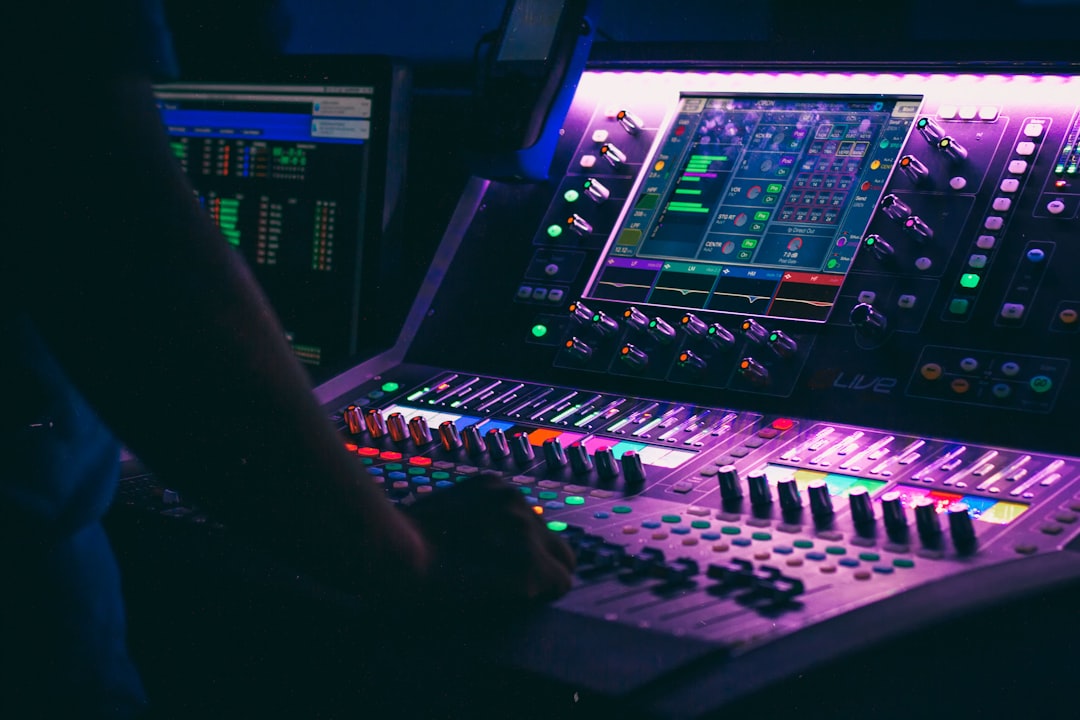
Mixers, interfaces, and recorders
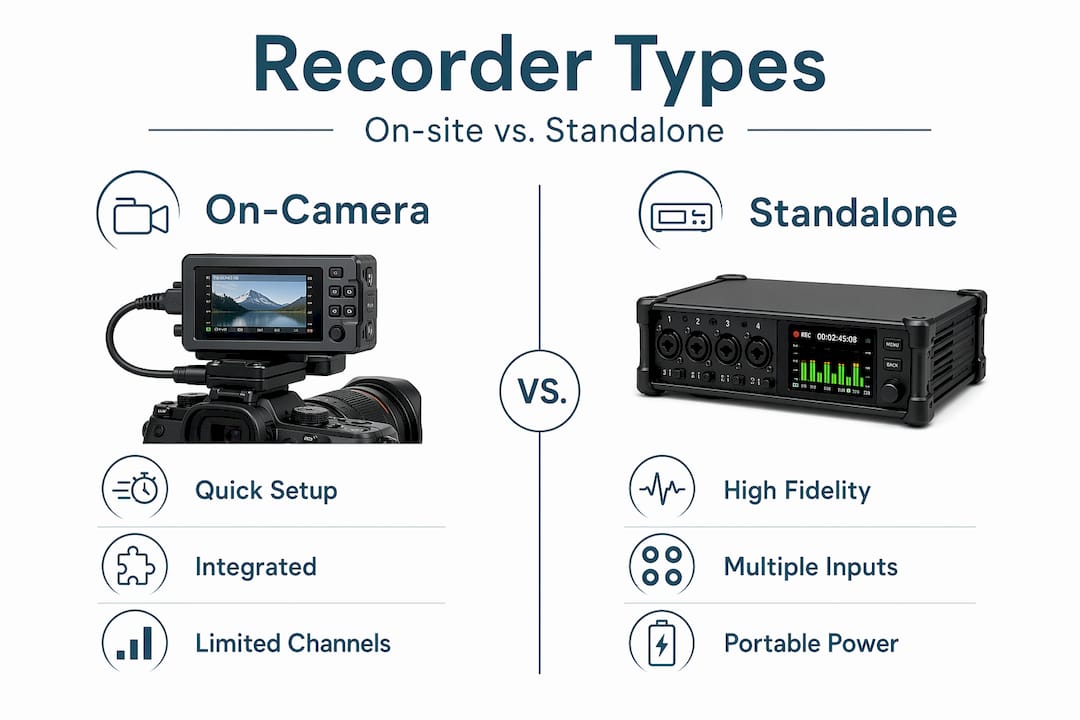
A portable audio recorder like a Zoom H6 or Tascam DR-40X lets you capture isolated, high-quality audio independent of your camera. Connecting directly to the venue’s soundboard via an XLR feed gives you the cleanest possible signal. An audio interface bridges your microphones to a laptop if you are recording digitally. For larger events, a mixing desk lets you control multiple inputs and adjust levels in real time.
Comparison of key audio gear
Gear type | Best for | Pros | Cons |
Lavalier mic | Speakers and presenters | Discreet, close-mic clarity | Easy to brush against clothing |
Shotgun mic | Camera-mounted or boom | Directional pickup, versatile | Distance-sensitive, picks up room noise |
Handheld dynamic | Live presentations, Q&As | Durable, handles loud sources | Requires someone to hold or stand |
Portable recorder | Backup and isolated capture | Independent of camera, clean signal | One more device to manage |
Mixing desk | Multi-input live control | Real-time level control | Steeper learning curve |
Headphones are essential for on-site monitoring; they let you catch a buzz, rustle, or hum the moment it happens rather than discovering it during the edit. Closed-back headphones are the right choice for loud event environments. Never skip them.
Pro Tip: Pack at least one complete backup kit: an extra lavalier, spare cables, an additional recorder, and a full set of batteries. At live events, something will fail. The question is whether you are ready for it.
Planning and venue evaluation before the event
Here is where most people cut corners, and it costs them later. Recording in rooms with hard reflective surfaces creates echo that is genuinely difficult to fix in post-production. Concrete floors, glass walls, and bare ceilings are red flags. Carpeted ballrooms, rooms with heavy drapes, and spaces with acoustic panels are much easier to work with.
What to assess during your site visit
Identify all noise sources: HVAC systems, kitchen ventilation, street traffic, adjacent rooms with events
Clap your hands sharply in different areas of the room and listen for reverb tail length
Locate all electrical outlets and confirm distance to your planned recording positions
Identify where the house PA speaker system is positioned to understand how sound will travel
Test for wireless interference by turning on your wireless lavs and walking the space
Understanding guest flow and key focal points helps you position microphones and speakers to avoid feedback and dead zones. A speaker who unexpectedly walks toward the front-of-house speakers while wearing a lav is a feedback situation waiting to happen. Walk the room with that scenario in mind.
If the room has major acoustic problems, you can do several things. Bring portable acoustic panels or sound blankets to hang near hard surfaces. Request that the venue keep HVAC systems off during recording segments. Ask for carpet runners in areas where footstep noise will be an issue.
Coordinating with the venue sound team
The house audio engineer is your ally. Introduce yourself early, explain your recording chain, and ask for a direct feed from the soundboard. Most venues are happy to provide an XLR split if you ask. Just confirm in advance whether that output is mic level or line level, because connecting the wrong level can result in distortion or a signal so weak it is barely usable.
Pro Tip: Schedule your soundcheck at least 45 minutes before doors open. That gives you time to identify and fix problems rather than just identify them.
Step-by-step audio setup and live monitoring
Once you are on-site and the gear is unpacked, follow a consistent workflow. Improvising on the day is how small problems become catastrophic ones.
Run and label all cables first. Connect microphones, route XLR cables to your recorder or mixer, and tape down any cables crossing foot traffic areas. Label every input so you know exactly which channel is which during the event.
Confirm signal levels at the source. Confirm whether soundboard outputs are at mic level or line level before connecting. Plugging a line-level output into a mic-level input causes immediate distortion. Most portable recorders have a pad switch to handle line-level signals.
Set recording levels with the -12 dBFS target. Keep dialogue peaks between -12 and -6 dBFS during your soundcheck. This gives you enough headroom that a loud, unexpected shout or applause burst will not clip and distort your recording.
Perform a full soundcheck with all participants. A structured soundcheck verifies your mix, wireless performance, and catches buzzes or hums before the audience arrives. Have each speaker talk at their natural volume, not an exaggerated soundcheck voice, because people almost always speak quieter during the check and louder during the actual event.
Put on your headphones and do not take them off. Monitor every audio source continuously throughout the event. A cable can loosen, a battery can die, or a lav can get covered mid-speech. You will only catch these things in real time if you are listening.
Record a backup audio stream. Run a separate recorder as a failsafe, independent of your primary camera audio or main recorder. Many videographers tap a feed from the house PA to a secondary device so they have at least two isolated audio sources for every moment of the event.
Common issues and quick fixes
Hum or buzz: Usually a ground loop between audio equipment. Try using a DI box with a ground lift switch.
Pops and thumps: Often caused by handling noise or proximity effect on dynamic mics. Use a foam windscreen and remind speakers not to hold the microphone capsule.
Dropouts on wireless mics: Check battery levels immediately and relocate the receiver antenna if possible. Keep a wired backup ready to swap in.
Post-event audio verification and optimization
The event is over, but the audio work is not. What you do in the next phase determines whether your recording sounds like a professional broadcast or a room recording. These are not optional finishing touches. They are where quality is actually built.
Record 30 to 60 seconds of room tone silence at each scene location before you pack up. This ambient noise sample is the reference your noise reduction plugin uses to isolate and remove background sound without chewing into the natural voice quality. Do not skip this step.
Quick reference for post-production audio settings
Adjustment | Target setting | Purpose |
High-pass filter | Roll off below 80 to 100 Hz | Removes HVAC rumble and low-frequency vibration |
De-esser | Target 5 to 7 kHz | Reduces harsh sibilance in vocal recordings |
Background music level | 8 to 12 dB below dialogue | Keeps speech intelligible and front-and-center |
Noise reduction | Light passes only | Aggressive processing creates unnatural artifacts |
Additional optimization tips
Apply a high-pass filter to every voice track before any other processing. It removes low-frequency rumble from air conditioning and foot traffic that you may not even hear consciously but that muddies the overall mix.
Use dialogue ducking when your edit includes background music. Ducking automatically lowers music volume when speech occurs, so you never have to choose between atmosphere and clarity.
Check your final audio export in both stereo and mono playback. Some event videos get embedded in platforms where mono is the default, and a stereo mix with phase issues will sound hollow or completely cancel out on mono playback.
Pro Tip: Export a reference mix at standard broadcast level (targeting around -14 LUFS for most streaming platforms) and listen to it on at minimum three playback devices: studio monitors, laptop speakers, and phone speakers. If it holds up on phone speakers, it will hold up everywhere.
My honest take on live event audio
I have been in rooms where the video looked exceptional and the audio was borderline unusable, and I can tell you without hesitation which problem is harder to recover from. Audio quality is the primary driver of viewer retention in live event video. Shaky footage can feel authentic. Distorted audio just feels broken.
The biggest misconception I see is the idea that better gear solves audio problems. It rarely does. The gear helps, but the environment and preparation do most of the work. I have gotten clean, usable audio from a consumer-grade recorder in a well-treated room, and I have struggled with high-end equipment in a glass-walled conference center with hard floors and six HVAC vents running above the stage.
What actually moves the needle is the site visit, the early soundcheck, and the discipline to keep your headphones on and stay engaged throughout the event. Audio problems announce themselves early if you are listening. If you are distracted, they announce themselves in the edit bay instead, where your options are much more limited.
My advice: when you are planning your next event video, spend as much time thinking about your audio setup as you do about camera angles and coverage. The live stream production setup decisions you make before the event are worth more than any plugin you apply after it.
— Charlie
Work with Puritano on your next live event
At Puritano, we have spent over two decades capturing live events across Washington D.C. and nationally, and audio is never an afterthought in how we work. From virtual event production with complex multi-source audio to live music capture for our music video clients, we treat sound with the same seriousness as the visual side of the production.
If you are planning a live event and want a production partner who understands both the technical and creative demands of capturing great audio on location, we would welcome the conversation. You can explore our video production services to see the full range of what we do, or reach out directly to talk through your specific project needs. We are here to help you get it right from the first cable to the final export.
FAQ
What is the best microphone type for live event videography?
Lavalier microphones work best for stationary speakers and presenters, while shotgun microphones handle camera-mounted or boom-pole scenarios. For the most reliable coverage, use a combination of both types along with a direct feed from the venue’s soundboard.
How do I prevent audio clipping during a live event?
Set your input peaks to around -12 dBFS during soundcheck. This creates enough headroom to handle unexpected loud moments, like applause or a raised voice, without the signal distorting.
Why does my live event audio sound hollow or echoey?
Echo and hollow sound almost always come from recording in rooms with hard reflective surfaces like concrete, glass, or bare walls. Position soft materials near sound sources when possible, and record in spaces with carpet, drapes, or acoustic panels.
What should I do if a wireless microphone drops out mid-event?
Check battery levels immediately and reposition the receiver antenna to reduce distance or obstacles between it and the transmitter. Always have a wired backup microphone ready to swap in within seconds.
How do I get clean dialogue in the post-production mix?
Apply a high-pass filter rolling off below 80 Hz to remove rumble, then set background music 8 to 12 dB below dialogue and use automatic ducking to keep speech intelligible whenever music and voice overlap.
Recommended
Comments