Editing Video Production: A 2026 Practical Guide
- Charlie Puritano
- 8 hours ago
- 8 min read
Editing video production is the process of shaping raw footage into polished, purposeful content that meets specific marketing and storytelling goals. Post-production editing is the industry’s standard term for this phase, and it sits at the heart of every successful video project. Whether you’re a solo content creator or a business investing in creative video services, the quality of your edit determines whether your audience watches to the end or clicks away in the first ten seconds. Get the edit right, and every other production investment pays off.
What does editing video production actually require?
Editing video production starts long before you open a timeline. Pre-production quality accounts for roughly 80% of the final edit’s success. That number is not an exaggeration. When you skip scripting, storyboarding, or shot-listing, you pay for it in the edit room with hours of searching for coverage that was never captured.
Before you touch a single clip, you need three planning inputs:
A strategic brief. Define your audience, the funnel stage the video serves (awareness, consideration, or conversion), and the platform where it will live. A 60-second Instagram Reel and a 10-minute YouTube tutorial require completely different editing approaches. Aligning video with marketing funnels before filming prevents scope creep and missed deadlines.
A shot list and storyboard. These documents tell you exactly what footage you should have. During the edit, they act as a map. Without them, you’re assembling a puzzle with no picture on the box.
An organized media library. Label every clip, audio file, and graphic asset before importing anything. Use a consistent folder structure: project name, then subfolders for raw video, audio, graphics, and exports.
Choosing your editing software
Software choice depends on your skill level and output goals. Free tools like iMovie handle simple cuts and basic color adjustments well. Professional suites like Adobe Premiere Pro, DaVinci Resolve, and Final Cut Pro enable advanced color grading, motion graphics, and multi-format exports. Entry-level creators can start free and upgrade when their projects demand it.
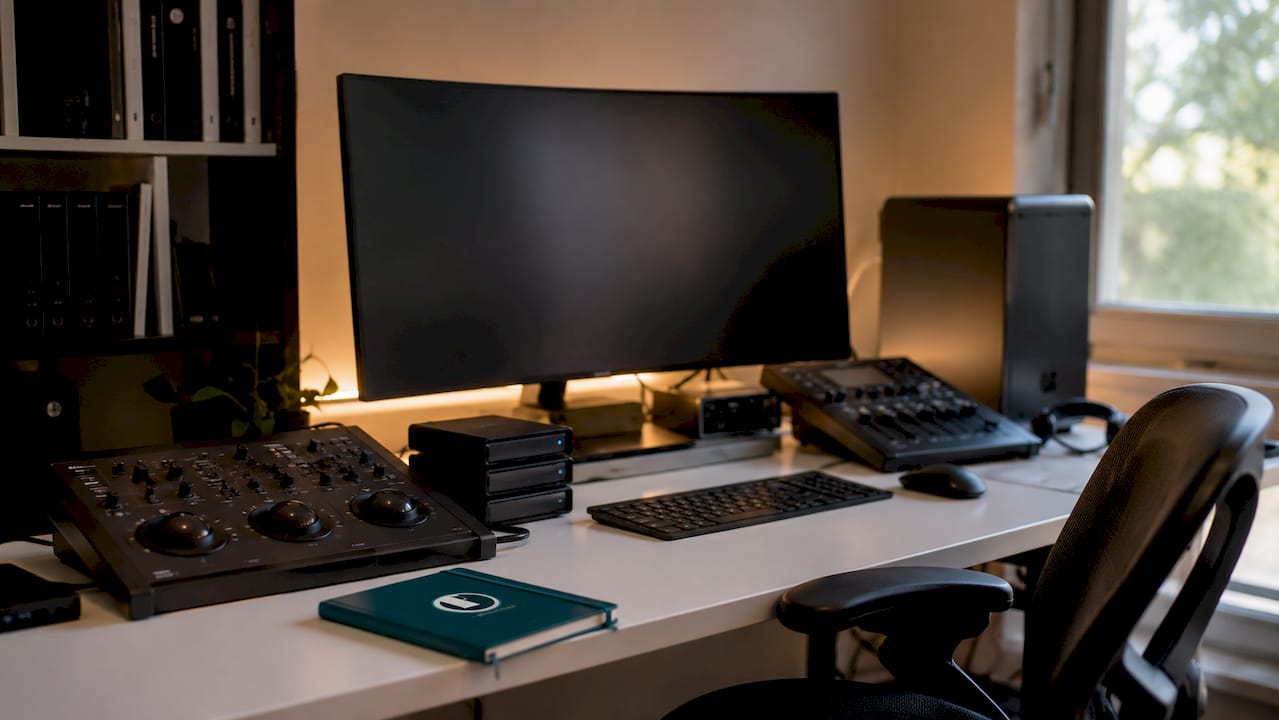
Hardware and backup basics
Your computer needs enough RAM and a dedicated GPU to play back high-resolution footage without dropping frames. A minimum of 16GB of RAM handles most 1080p projects. For 4K work, 32GB is the practical floor. Storage is equally critical. Use the 3-2-1 backup rule: keep three copies of your project, on two different media types, with one copy stored off-site or in the cloud.
Pro Tip: Create a new backup of your project file at the end of every editing session. Drives fail without warning, and losing a half-finished edit is a preventable disaster.
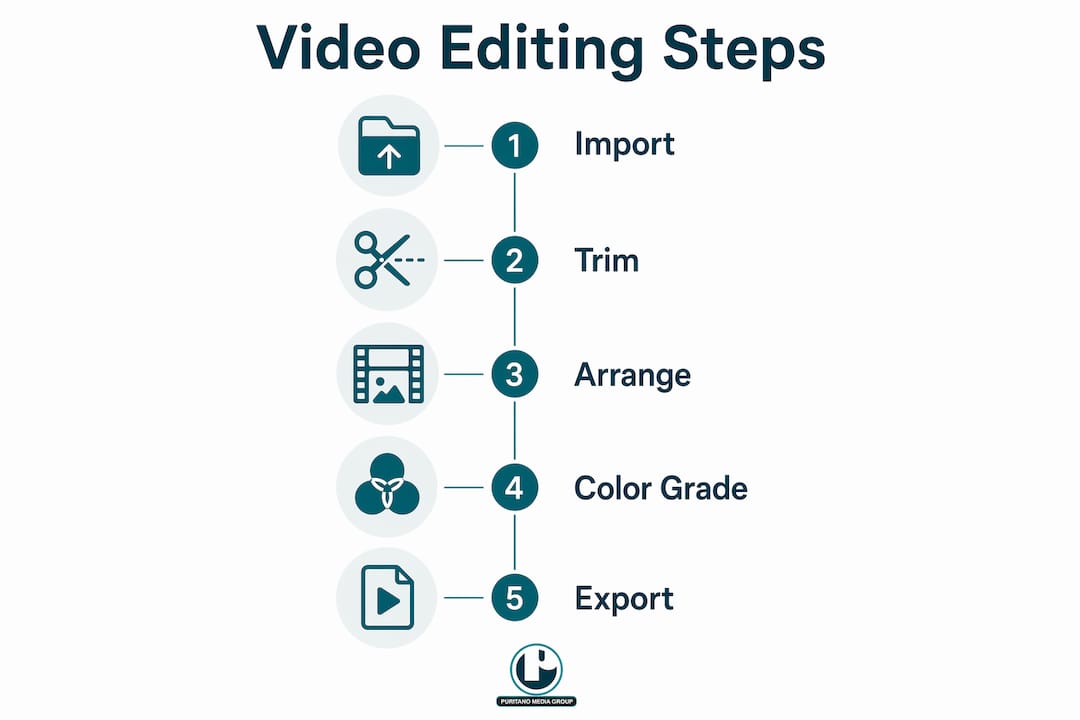
How do you execute a video edit from start to finish?
The core of any video editing procedure follows a clear sequence. Skipping steps creates problems that compound later, so work through them in order.
Import and organize your media. Bring all clips, audio, and graphics into your project panel. Do not edit directly from a camera card or external drive. Copy everything to your working drive first.
Build a rough assembly cut. Place your clips on the timeline in story order without worrying about precision. The goal is to see the full arc of the piece. Think of this as laying out all your puzzle pieces face up.
Trim and cut for pacing. Use the selection tool (keyboard shortcut: V) to move clips and the razor tool © to make cuts. Remove anything that does not serve the story. Silence, filler words, and redundant shots all go at this stage.
Apply ripple edits to close gaps. The ripple edit tool (B) removes a clip and automatically pulls the rest of the timeline forward. This keeps your edit tight without leaving black gaps that you have to manually delete.
Add audio, music, and voiceover. Lay down your primary audio track first, then add music underneath at a lower volume. Voiceover goes on a separate track so you can adjust levels independently. Non-destructive editing means all these adjustments only affect references to your original files. The source footage stays intact, so you can always go back.
Insert transitions and captions. Use cuts as your default transition. Reserve dissolves and other effects for moments that genuinely call for them. Add captions on a dedicated text track. Captions improve accessibility and boost video visibility in search results.
Export a review draft. Send a compressed version to stakeholders before doing any color work. Structural changes after color grading waste time.
Pro Tip: Learn ten keyboard shortcuts before you learn anything else. V, C, B, I, O, comma, period, L, J, and K cover 90% of timeline actions and cut your editing time significantly.
How do color grading and advanced techniques improve your final video?
Color correction and color grading are two distinct steps, and confusing them is one of the most common mistakes in video editing production. Color correction fixes technical problems: white balance, exposure, and contrast. Color grading applies a creative look that matches the tone of your story. Always correct before you grade.
Motion graphics and lower thirds
Motion graphics add professionalism and reinforce brand identity. Lower thirds, which are the text overlays that identify speakers or locations, are the most common motion graphic in corporate and branded video. Keep them simple: name, title, and company. Animated logos and branded intros serve the same function. They tell the viewer who made this and why it looks the way it does.
Syncing voiceover and licensed music
Voiceover should sit at roughly 6–12 dB below the loudest point of your music bed. Licensed music from platforms like Artlist or Musicbed gives you legal clearance for commercial use. Never use copyrighted music without a license. The fine is not worth it, and platforms will mute or remove your video automatically.
Exporting for different platforms
Every platform has specific format requirements. Ignoring them causes letterboxing, cropping, or poor playback quality. The table below covers the most common platform specs for 2026.
Platform | Aspect ratio | Recommended resolution | Max file size |
YouTube | 16:9 | 1920x1080 or 4K | 256GB |
Instagram Reels | 9:16 | 1080x1920 | 1GB |
16:9 or 1:1 | 1920x1080 | 5GB | |
16:9 or 4:5 | 1280x720 minimum | 10GB | |
TikTok | 9:16 | 1080x1920 | 287.6MB |
Always check the 2026 platform spec guide before exporting. Specs change, and an outdated export setting can undermine an otherwise excellent edit.
What are the most common challenges in video editing production?
Most editing problems trace back to decisions made before filming started. Recognizing the patterns helps you fix them faster and avoid them next time.
Scope creep from a vague brief. When the project goal is unclear, clients request changes that expand the edit indefinitely. A strategic brief that defines audience, funnel stage, and platform goals before filming prevents this. Lock the brief in writing before production begins.
Ignoring platform requirements. Exporting a 16:9 video for a platform that favors 9:16 means your content gets cropped or displayed with black bars. Check specs before you export, not after.
Poor file organization and storage. Large video files fill drives fast. Use an external drive with at least twice the storage you think you need. Organize clips by scene or shoot date. Disorganized media libraries add hours to every edit.
Timeline gaps and sync problems. Gaps in the timeline cause black frames in the final export. Audio sync drift happens when you mix clips recorded at different sample rates. Check your sequence settings before importing and match your audio sample rate to your project settings.
Skipping review cycles. One round of internal review before client delivery catches most structural problems. Two rounds catch almost everything. Skipping review to save time almost always creates more revision work later.
Visual content drives significantly higher engagement than text alone. That fact makes the quality of your edit a direct business variable, not just a creative preference.
Key Takeaways
Effective video editing production combines structured pre-production planning, disciplined timeline technique, and platform-specific export preparation to produce content that serves both creative and marketing goals.
Point | Details |
Pre-production drives edit quality | Scripting and storyboarding account for roughly 80% of final edit success. |
Non-destructive editing protects footage | Always edit on a timeline that references originals, never altering source files. |
Platform specs determine export settings | Match aspect ratio and resolution to each platform before exporting. |
Keyboard shortcuts accelerate workflow | Shortcuts like V, C, and B reduce tool-switching time on every project. |
Review cycles prevent costly revisions | Build at least two structured feedback rounds into every project timeline. |
What I’ve learned after two decades of editing video production
Here’s the honest truth that most editing tutorials skip: the edit is not where great videos are made. Great videos are made in the planning phase. I’ve watched talented editors spend 40 hours trying to rescue footage that a 20-minute pre-production conversation would have prevented. The edit can only work with what was captured. If the story wasn’t planned, the coverage wasn’t shot, and the brief wasn’t locked, no amount of technical skill in post-production saves the project.
The second thing I’ve learned is that integrating video with marketing strategy is not optional for businesses. A beautifully edited video that lives on the wrong platform, targets the wrong audience stage, or has no distribution plan attached to it does almost nothing. Multichannel coordination multiplies the return on every production dollar. The edit is the last creative step, but the marketing plan should be the first.
The beginner mistake I see most often is treating color grading as the finish line. Editors spend hours on a look and then export at the wrong resolution for their platform. The grade means nothing if the delivery is wrong. Get your export settings locked before you spend time on polish.
My advice to any creator or business building a video practice: invest in your pre-production process first, your editing skills second, and your equipment last. The order matters more than most people realize.
How Puritano supports your video production goals
Puritano Media Group brings over two decades of full-service video production experience to content creators and businesses across the Washington D.C. area and nationally. From music video production with frame-level editing precision to virtual events with complete post-production support, Puritano handles every phase of the production process. The team works with corporate clients, nonprofits, government agencies, and brands that need creative video production services built around real marketing goals. If your current editing workflow is producing results below your expectations, Puritano’s production team is worth a conversation.
FAQ
What is editing video production?
Editing video production is the post-production process of assembling, trimming, and polishing raw footage into a finished video that meets specific storytelling and marketing goals. It includes cutting, color grading, audio mixing, and export preparation.
How much does pre-production affect the final edit?
Pre-production quality accounts for roughly 80% of the final edit’s success. Scripting, storyboarding, and shot-listing reduce costly fixes and wasted time in post-production.
What is non-destructive editing?
Non-destructive editing means your timeline edits only affect references to the original footage. The source files stay intact, so you can always undo changes or try a different approach without losing anything.
What aspect ratio should I use for social media video?
The correct aspect ratio depends on the platform. YouTube uses 16:9, while Instagram Reels and TikTok use 9:16. LinkedIn accepts both 16:9 and 1:1. Always confirm current specs before exporting.
When should a business hire a full-service video production company?
A business should hire a full-service video production company when internal resources cannot cover scripting, filming, editing, and distribution strategy together. A full-service production company handles all phases and aligns the final product with marketing goals from the start.
Recommended


Comments